How to share, sync and secure notebooks in OneNote 2016
How to share, sync and secure notebooks in OneNote 2016

Unlike what you've been told at school, notes are often intended to be shared. OneNote 2016 offers a few ways to share the contents of your notes with friends and colleagues. It also helps you maintain control of the data by enabling you to secure it. Here's how you can share, sync and secure your notes.
How to share notes in OneNote 2016
OneNote 2016 allows you to share note pages and notebooks through email, permissions, and links. You can control if the recipients can edit the content, or view it without any other permissions.
 How to share a locally saved notebook to OneDrive
- Open the OneNote notebook that you wish to share on OneDrive.
- Click File.
- Select Share from the list on the left.
- Select your OneDrive account in the Share Notebook pane. If you haven't signed in yet, click Add a Place to sign in.
- Navigate to the destination in OneDrive.
- Enter the same name or a new name for the notebook.
- Click Move Notebook.

How to invite people through email to share
your notebook
- Click File in the navigation ribbon
- Select Share.
- Select Share with People.
- Enter names or email addresses of invitees in the Share with People window.
- Click on the drop-down box on the right.
- Choose if each recipient can edit or view the notebook.
- Modify the outgoing message if necessary.
- Click Share.
How to revoke or change sharing permissions for your notebook
- Select the File tab in the navigation ribbon.
- Select Share.
- Select Share with People.
- Move to the Shared with section and view the invited individuals.
- Right-click the name of a user.
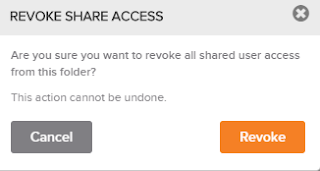
- Choose Remove User from the drop-down to revoke access.
- Choose Change Permission to in order to switch between Edit or View.


How to create a sharing link
- Click File.
- Click Share from the left pane.
- Choose Get a Sharing Link.
- Click Create a view link to generate a view-only link.
- Click Create an edit link to generate a view and edit link.
- To disable these links, you only need to navigate back to the Get a Sharing Link screen and click Disable view link or Disable Edit link.
How to Share a page from your notebook
- Click on the page that you wish to share.
- Click the Home tab in the navigation ribbon.
- Select Email Page in the Email group. The page contents will be populated in an Outlook New Message email body.
- Enter a recipient in the To: field
- Enter text in the Subject field
- Add any additional text in the message body.
- Click Send.
How to sync a notebook in OneNote 2016
Automatic synchronization is a key feature of OneNote 2016 but users do have the option to prompt the option on their own. Since the automated feature is done at regular intervals, the manual sync is helpful to ensure data is updated immediately.
How to manually sync notebooks
- Click File in the navigation ribbon.
- Click Info.
- Click View Sync Status.
- Choose to Sync All to sync all shared notebooks simultaneously.
- Choose Sync Now next to notebooks to sync manually.
How to manage security options in OneNote 2016
OneNote 2016 includes basic security options that will prevent unauthorized access to specific sections of your notebook.
How to apply a password to sections
- Navigate to the row of section tabs.
- Right-click on the section you wish to secure.
- Select Password Protect This Section from the down-drown list.
- Navigate to the Password Protection pane that appears on the on the right side of the OneNote Window.
- Click Set Password under the Current Section listing.
- Enter a password in the Password Protection dialog box.
- Re-enter the password to confirm.
- Click OK.
Keep in mind that the password will not be applied to the section immediately. By default, it will activate after five minutes of inactivity. Your tabs will still be visible but the contents of the page are hidden behind the message "This section is password protected". You will have to click on the page space to display the Protected Section dialog box where you will have to enter the password to gain access. You can manually bypass the lock-out timer and lock all protected sections by selecting Lock All in the Password Protection pane, or by pressing CTRL + ALT + L.

How to remove a password from a protected section
- Riht-click on the tab of the protected section.
- Select Password Protect this Section from the drop-down list.
- Select Remove Password from the Password Protection pane.
- Enter the current password in the Remove Password dialog box.
- Click Ok to complete the password removal.
How to change the password for a protected section
- Right-click on the section tab that you want to change the password for.
- Select Password Protect this Section.
- Click Change Password in the Password Protection pane.
- Enter your current password into the Old Password field of the Change Password dialog box.
- Enter the new password in the Enter New Password field.
- Enter the new password again into the Confirm Password box to verify.
- Click Ok.
How to access Password options
- Click on the File tab in the navigation ribbon.
- Click Options in the left pane.
- Click Advanced in the menu of the OneNote Options dialog box.
- Scroll down to the Passwords section in the list on the right side of the dialog box.
In this section, you can alter the protection delay from the default 5 minutes. Eleven periods are available with 1 minute being the shortest amount of time and 1 day is the longest. You can also uncheck the box for the time-day option to remove the timer altogether. You can also choose to automatically lock your password protected sections immediately after navigating away from them. Even if you click on another section tab, the protected section will be promptly secured.

If you rely on OneNote search options to filter through your content, password protection will prevent locked sections from being included in your search results. The same can be said for note tags as they will not be included in note tag summaries.
Be sure that you use a password that you can remember. If you forget your password, you will not have access to any recovery options, nor will Microsoft Tech Support be able to unlock them for you.
Image Source: Google
So, what do you think about this? Share your views in the comment box below.
Don't forget to Like, Share, Comment and subscribe!
•?((¯°·._.• ƒ๏ℓℓ๏ώ ʍ€ ƒ๏я ʍ๏я€ µρďąţ€$....ąɲď $๏ℓµţɨ๏ɲ •._.·°¯))؟•
Manjot Singh
Ceo & Founder|TheInfifun
Manjot Singh
Ceo & Founder|TheInfifun


Comments
Post a Comment